3D printing and Essix Retainer

I know others have posted different techniques using other softwares to execute Essix retainers. I don't think anyone has done it the way that I have though, so I thought I would share...
If you have heard me speak about my feelings on 3D printing, I love it.... BUT, I will not completely love it until I can be 100% digital for all procedures. Now theoretically you can do that now, but I want it to be efficient. That is, I currently mostly print models and guides for esthetics and implants. What I want is to be able to handle everything from bleach trays to essix retainers, etc... I basically want to eliminate all impression materials completely from my office. For this, 3D printing needs to be fast and also a bit more automated I believe. Once that is the case, I would certainly be willing to pay more for a 3D printer if it had more applications like this.
So.. here is a case I did with the inLab software. I know that most of you do not have the inlab software (in US), but it gives you an idea of the possibilities that hopefully we will see at some point.
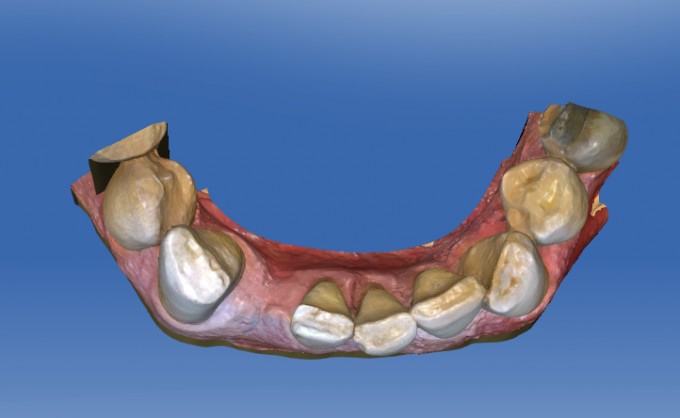
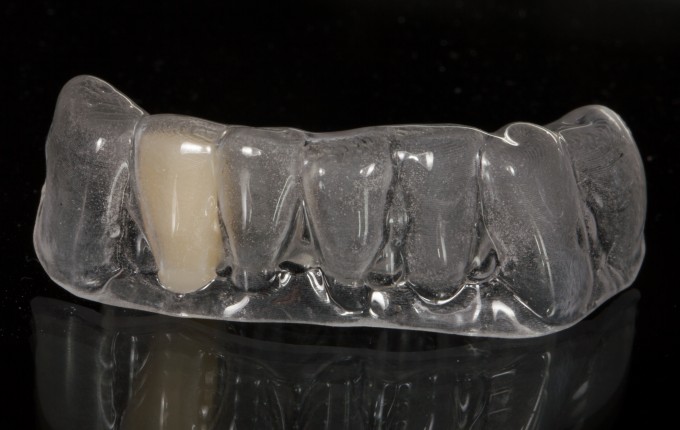
Patient missing tooth #26. Has been wearing an essix retainer long term that he broke.
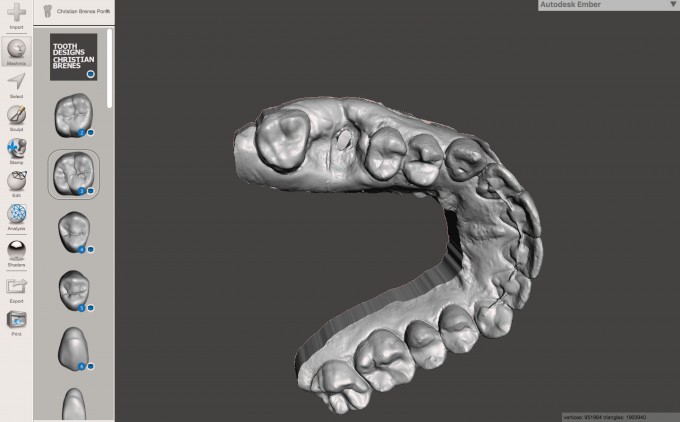
Scanned with the Omnicam:

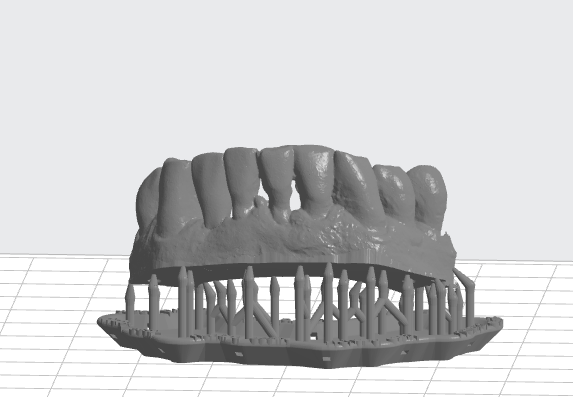
Exported .stl high resolution and loaded into inLab 18. From there, designed a crown in the space:
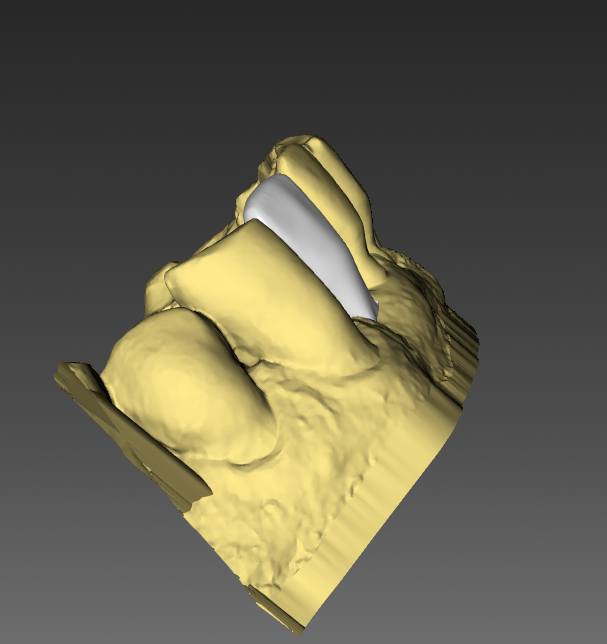
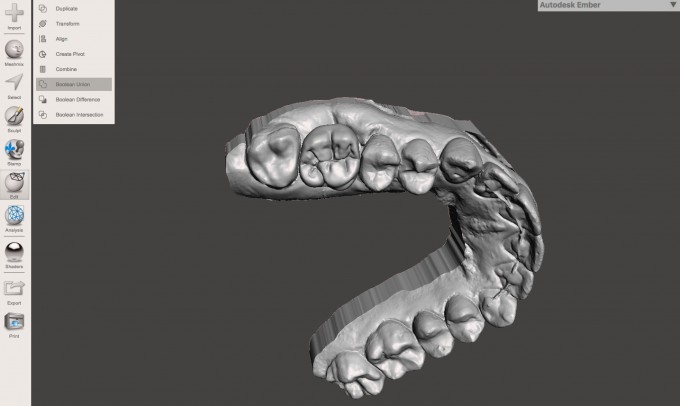
After design, virtually seated and added a base to it:
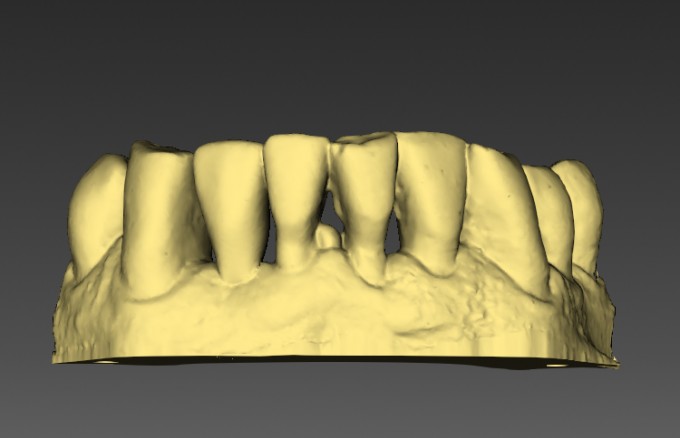
3D printed it in grey resin (100 microns Z)
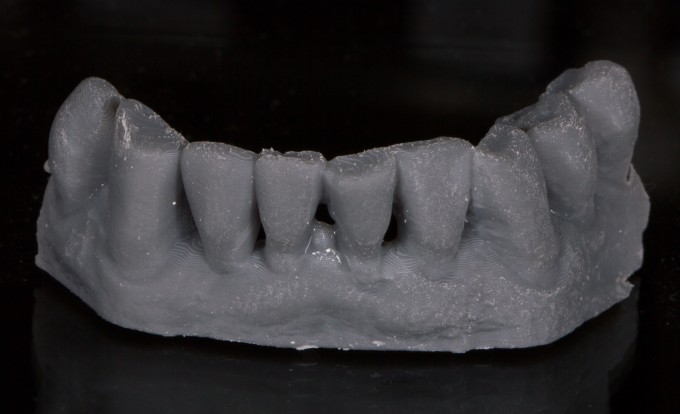
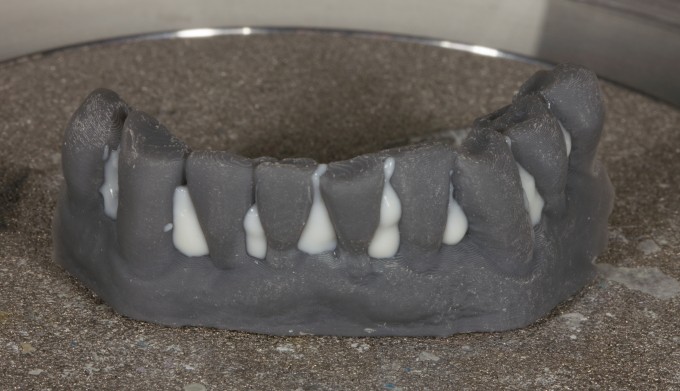
Block out undercuts and used Ministar and 1mm Clear Splint Biocryl :
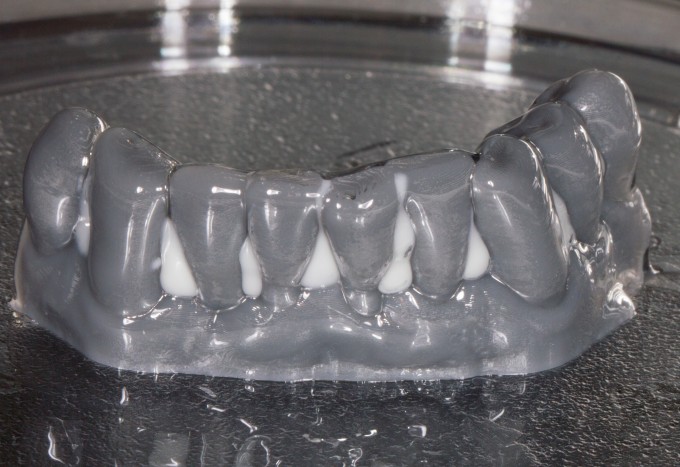
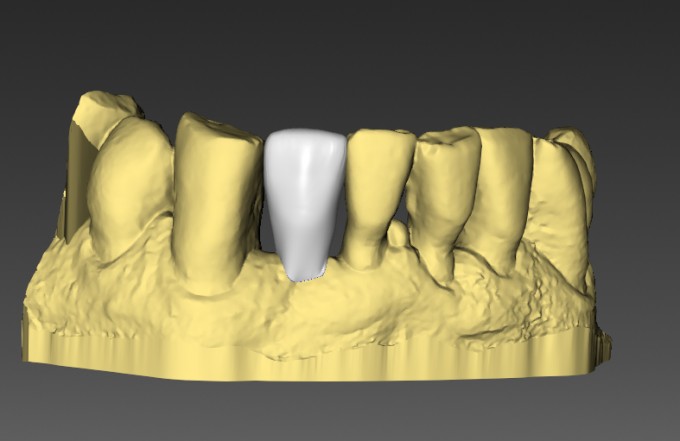
Now, the best part... go into inlab 18 software, reverse the virtual seat and choose the original layer, export the .dxd file, import into CEREC and then mill the tooth (composite block). Then insert it into the Essix...done.
There may be cheaper ways to do this, but this was super easy and my guess is that it will be very predictable. That is what is important to me.

Great execution - hopefully we can someday do this without the use of Inlab software.....quick questions why did you choose to use supports on the print? Still trying to learn all the details of printing myself.
Nice! What I had to do without Inlab is actually mill out a tooth from chairside and then either glue that on the printed model or scan the model with the glued tooth in place and print again. Either took a long time.
On 6/18/2018 at 1:47 pm, Mike Skramstad said... Andrew- Used the supports out of pure laziness ;)
That's funny - glad I'm not the only one that falls into this category from time to time.

Trying to think of how I’d do this without inLab. Maybe design and mill the pontic tooth while printing the model. Then make the Essix by spot bonding the pontic to the printed model and forming the essix.
The key would be bonding the Pontic well enough to the printed model so it doesn’t move during thermoforming but not too well so that you can pop it off the model later and bond into the Essix. Worst case scenario you could always fill the Pontic space with composite, right?

You can do it in Meshmixer, but it's not as elegant and certainly not as accurate. It does allow you to merge a stock tooth with a model and print, but it takes an effort to get it to fit well.
This all sound great except that, after all this trouble to fabricate, the patients gets to have is discomfort of wearing an essex. I'm curious at why you guys do this appliance as I find that I seem to replace nearly all of the essex retainers my periodontist makes for implants patients with either flippers or Md bridges since my experience is that everyone hates these. "I can't eat with this and it looks funny" is what I get. If I can't place a MD bridge due to lack of space, a quick alginate sent off and a return visit to deliver a flipper in a couple days seems much easier and although flippers aren't great, patients seem much happier with them and they can go out to eat without having to take them out. What am I missing? Also, what do you charge for fabrication of an essex? wondering how it compares to my flipper charge given that there is a small lab fee.

On 6/19/2018 at 6:53 am, Greg Zlock said...This all sound great except that, after all this trouble to fabricate, the patients gets to have is discomfort of wearing an essex. I'm curious at why you guys do this appliance as I find that I seem to replace nearly all of the essex retainers my periodontist makes for implants patients with either flippers or Md bridges since my experience is that everyone hates these. "I can't eat with this and it looks funny" is what I get. If I can't place a MD bridge due to lack of space, a quick alginate sent off and a return visit to deliver a flipper in a couple days seems much easier and although flippers aren't great, patients seem much happier with them and they can go out to eat without having to take them out. What am I missing? Also, what do you charge for fabrication of an essex? wondering how it compares to my flipper charge given that there is a small lab fee.
Flippers can be tricky from the stand point that many consider them to be tissue supported. And for an implant site that can be problematic. Making a flipper totally tooth supported is not that easy. An Essix appliance, while not ideal, is tooth supported.
On 6/19/2018 at 6:58 am, Mark Fleming said...On 6/19/2018 at 6:53 am, Greg Zlock said...This all sound great except that, after all this trouble to fabricate, the patients gets to have is discomfort of wearing an essex. I'm curious at why you guys do this appliance as I find that I seem to replace nearly all of the essex retainers my periodontist makes for implants patients with either flippers or Md bridges since my experience is that everyone hates these. "I can't eat with this and it looks funny" is what I get. If I can't place a MD bridge due to lack of space, a quick alginate sent off and a return visit to deliver a flipper in a couple days seems much easier and although flippers aren't great, patients seem much happier with them and they can go out to eat without having to take them out. What am I missing? Also, what do you charge for fabrication of an essex? wondering how it compares to my flipper charge given that there is a small lab fee.
Flippers can be tricky from the stand point that many consider them to be tissue supported. And for an implant site that can be problematic. Making a flipper totally tooth supported is not that easy. An Essix appliance, while not ideal, is tooth supported.
That makes sense but what's the problem with tissue support? Usually its mostly away from the site. You can easily keep the replacement tooth off the tissue during healing by relieving the bottom and you'd have to do the same with the essex, maybe tougher with multiple implant sites but for singles or doubles, I don't see a problem and all the pictures above were singles including mikes case that he said the patient had been wearing an essex a long time before it broke, it didn't look like there was an implant there, just a space.

From a surgical point of view in the majority of cases I will not allow a flipper for the first 2 weeks post-op...4 weeks post-op with bone grafts, where more swelling is anticipated. Now if it's a straightforward flapless implant placement then I will allow a flipper as long as it is soft relined and the hard acrylic doesn't touch the healing cap.
I agree that a flipper is usually more comfortable for patients, although not always. Especially in the Mandible (such as in Mike's case) a flipper can be more uncomfortable.
The best solution is obviously something bonded in place. Nowadays the majority of patients in our practice wear an Essix for the first 2-4 weeks and we then switch them to a flipper or a bonded replacement. Surprisingly, however, a good number will stick with the Essix (despite our offering) for 6 months sometimes. In those cases we do have to re-make them a couple of times during healing.
Farhad

This can be done in chairside only slightly different. We did it couple months ago.The patient had 7 and 10 implants after ortho. We did veneers on 6 8 9 11 and then had to hold the space with a retainer. We did not do the ortho but after implants tissue was a mess. We sent her to perio, but she wanted teeth 7 and 10
The difference is for chairside we just called the treatment bridges on 7 10 with a very small wing in the design on 6 11. We then printed the model with the pontics in like Mike did with stl etc. vacuum formed the essix retainer. We then milled the pontics I went ahead and used emax, could have been something else. after milling cut off the small wings Placed them right in the retainer worked great. Patient wore it almost 3 months

I have a suggestion that has worked well for me in the past. In a pontic or EXT site I will place just enough material (small bead of composite) to rough prep a crown. Scan the model, marginate, and mill an inexpensive composite block. Then I place the crown on the "prep" with a small amount of resin to act as a putty with just enough strength to hold the crown in place on the model while pulling down the Essix. The crown becomes one with the Essix tray and the inside of the crown can be simply filled in with flowable or any like material.
Not quite 100% digital, but definitely quick and easy.
On 6/18/2018 at 4:16 pm, Nathan Wong said...Trying to think of how I’d do this without inLab. Maybe design and mill the pontic tooth while printing the model. Then make the Essix by spot bonding the pontic to the printed model and forming the essix.
The key would be bonding the Pontic well enough to the printed model so it doesn’t move during thermoforming but not too well so that you can pop it off the model later and bond into the Essix. Worst case scenario you could always fill the Pontic space with composite, right?
We do it exactly like said and we hold the milled tooth on the model and use the drufomat and has worked great.
In fact recently on RCT treated failing teeth we section off the crowns on the same day that the patient has the surgery and use the same ones on the printed models and pressure formed on the drufomat and works great . Scanned before the surgery and model printed in 45 min - 1hr with the old moonray and then essix made and delivered right after surgery or sometimes in a couple of hours.