Front Teeth Always Interesting...

Morning all,
I thought'd I'd post this case for some critique. Still trying to learn characterization skills. Mike's videos have really helped me and I'm assuming several others with contouring these restorations. Here's how I approached this case.
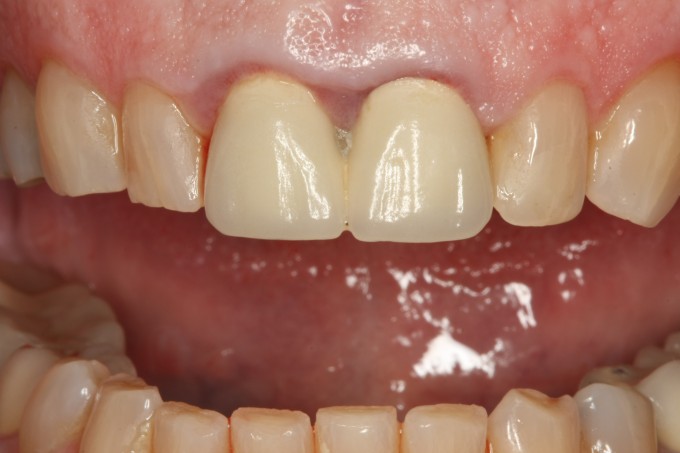
Patient presented with cosmetic concerns with 8 and 9. Crowns were connected with who knows what underneath. Both previous root canal treated.
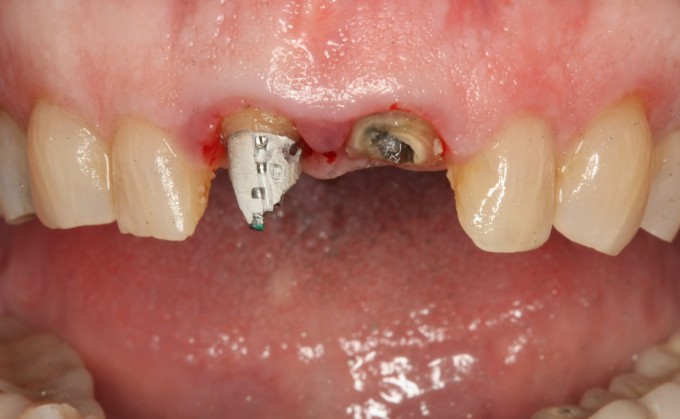
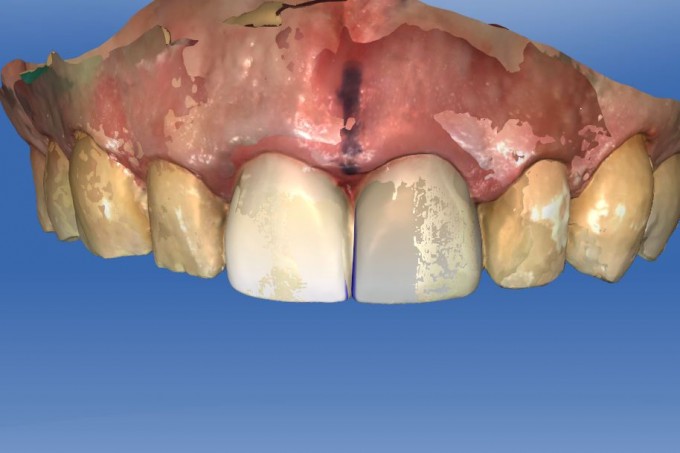
Had a mockup done and scheduled patient to have crowns removed. This is what we were left with.
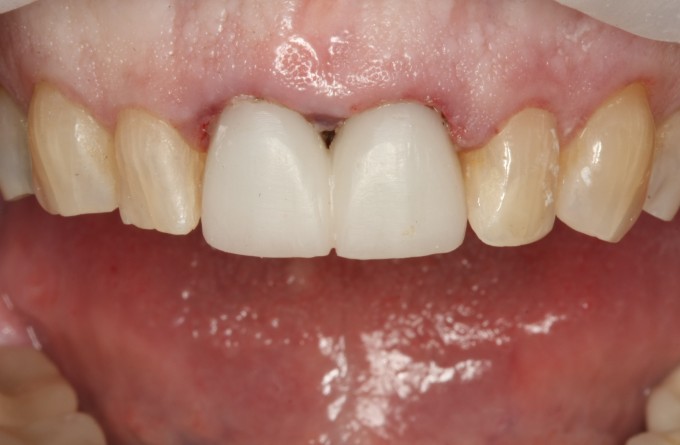
After prepping, placing new post in #9, BU and making temps, this is what she left with. Had plenty of ferrule even though it doesn't appear that way. And of course I dont carry every temp shade, but will now order some staining material for them. She was nice enough that she did not care.
Patient returned in a few weeks so I could scan the biocopy. I had taken one the day of the work, but saved the .rstimg file just in case she wanted some changes. When she came back I took a new image just because I had the idea of putting a marker for the midline for reference. Sometimes I feel like the proposals start looking weird so I decided to see if this worked. And it did help.
Proposal:
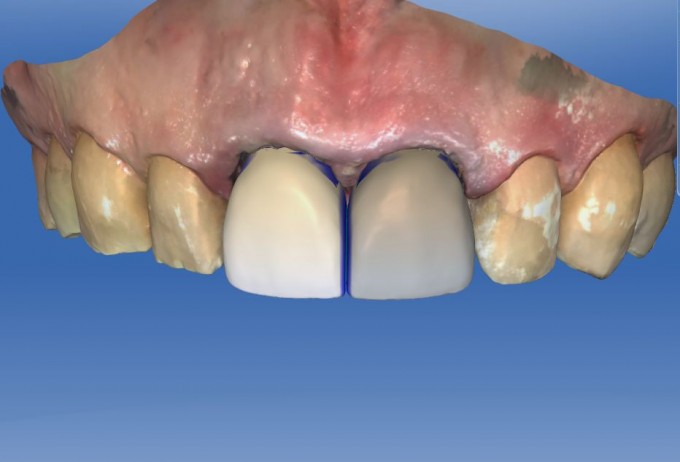
Biocopy with refernece line from sharpie. It did help, i moved the midline a bit to line it up.
Tissue healed before cementation after removal of temps:

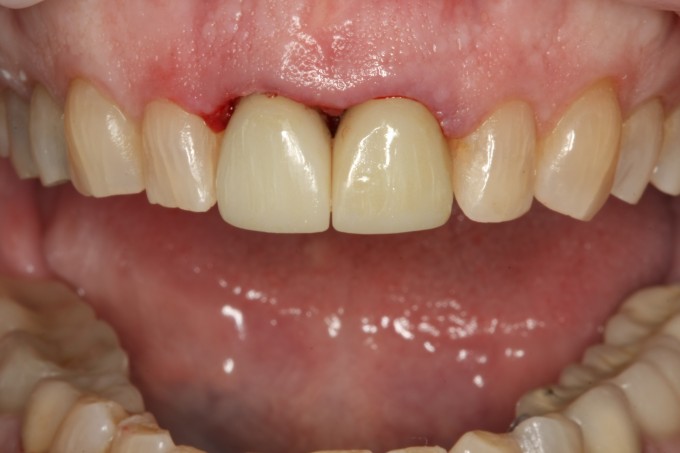
Then here are the finals immediate post op. She was thrilled. I think we could have done more translucency and the incisal embrasure is bugging me. Other than that, successful case. Just wanted to share the sharpie thing, in case that could help people in the future.
Cant wait for Cerec 30.
Tom
I think the characterization is superb. I suppose that in the camera flash, there is a SLIGHT color discrepency, but I would chalk this up as a success any day of the week. And the craze lines look fantastic. Also, I really like the Sharpe idea. Thanks for the tip.
My only conern is the contact length. The final image looks ok, but the design appears overly long. I know that her papilla had been blunted by the splinted crowns, but I would try and really open up the embrasure in the temp to allow the tissue to rebound as much as possible. Then, you could have a better idea of the papilla-potential. This all might be pointless, as it appears more idea in the actual final picture, but still something to think about.
Hope to see follow-up picks when the tissue has settled down. Nice work!
Baron,
I agree. I think it should come down. But again, scared to open up that embrasure too much. At final deliery tissue went up higher, had to pack cord so hopefully it will rebound. I'll post the follow up pics when she comes in. And i need to invest in a dual point flash, the ring flash just whites it out too much.
Tom
I think your pics will look incredible in two weeks.
Ive messed around with my ring flash to turn down its intensity and that has really helped to not white things out.

Tom, Great case. Thanks for posting. I love the "craze-lines". Is thast white stain and endo files?

Great case Tom and I agree, craze lines look good. Can you share your technique? I just posted a case asking for tips on craze line and characterization.
Tough case too on your end with endo treated teeth...Did you use LT blocks?
On 9/2/2015 at 9:38 am, Nassim Missaghian said...Tom, Great case. Thanks for posting. I love the "craze-lines". Is thast white stain and endo files?
Nassim,
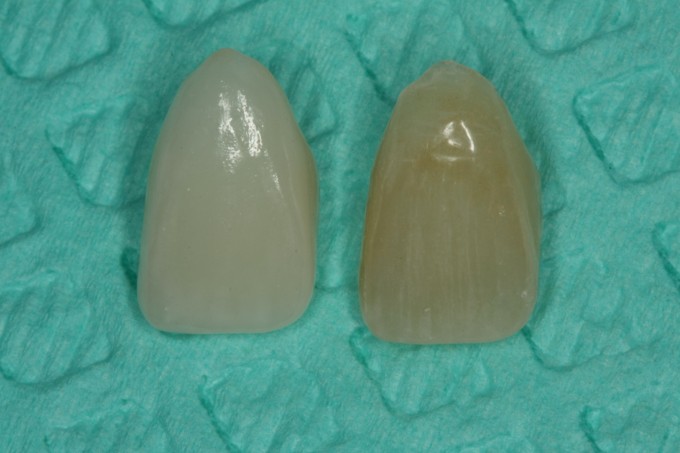
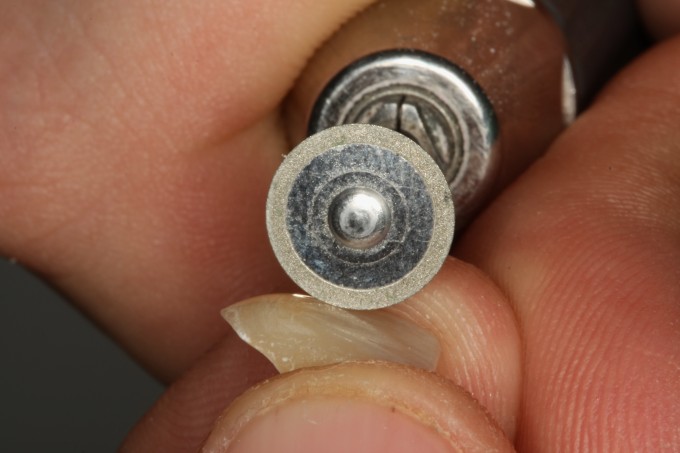
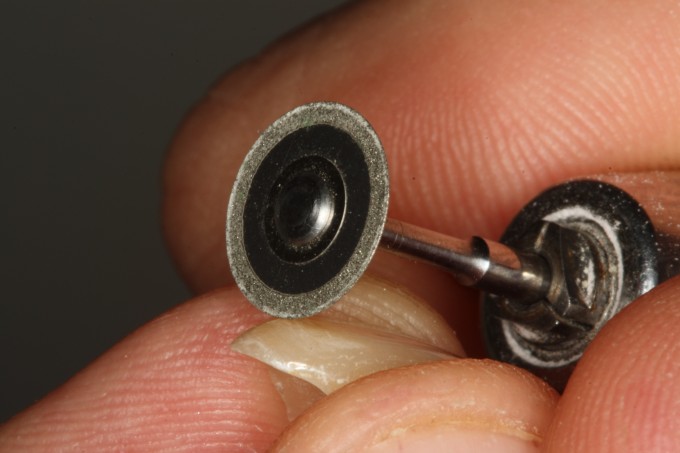
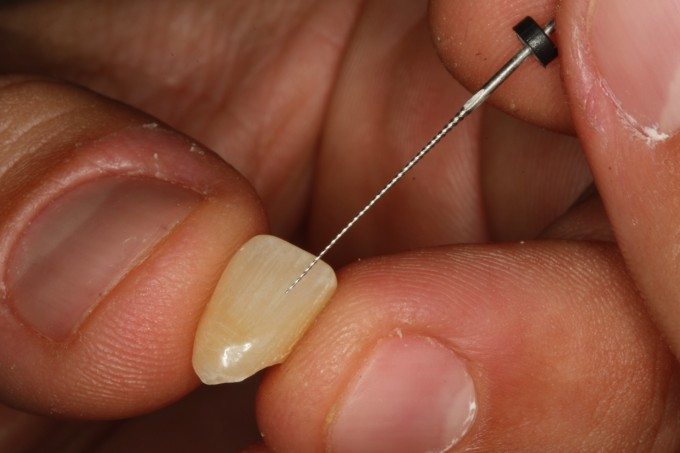
I will probably get someone saying this isnt the way to do it, but here is my technique. The crowns I'm showing are ones we have just practiced on. I think it really helps. After we do a case, sometimes i'll mill out an extra and let my team practice. And they are getting better. Normally with anteriors, I do 2 visits b/c it's too stressful for me. After they mill out, I contour them. After contouring is complete, i'll use the small disk from the cerec docs finishing kit and "scratch" the surface vertically then horizontally around the cervical. This is done very lightly and quickly. This give the restoration texture. You can also do with the diamons just brushing them across the surface. Then I'll sandblast the surface (some ceramists I have talked so said this will release the surface tension and allow the stains to sit there and not run; the surface texture will do that as well). Then I steam clean really well. Then I'll crystalize. (so no staining yet). When it comes out i usually just leave on the putty and peg. Then we stain it. Use the base colors first then place your white with an endo file. White always last thing you do. Then I refire it. The final thing we do is glaze. So I've started bringing the patient in after everything is done but the glaze. So if we have to make changes we can do so chairisde. You can place stains in the mouth then tease the restoration off place it on peg the final fire.

On 9/2/2015 at 9:51 am, Daniel Wilson said... Great case Tom and I agree, craze lines look good. Can you share your technique? I just posted a case asking for tips on craze line and characterization. Tough case too on your end with endo treated teeth...Did you use LT blocks?
Daniel,
I used Impulse V1. I really like these for the anterior. With the MTs coming out it will help with shade selection even more.
Tom
On 9/2/2015 at 11:32 am, Tom Monahan said...On 9/2/2015 at 9:51 am, Daniel Wilson said... Great case Tom and I agree, craze lines look good. Can you share your technique? I just posted a case asking for tips on craze line and characterization. Tough case too on your end with endo treated teeth...Did you use LT blocks?Daniel,
I used Impulse V1. I really like these for the anterior. With the MTs coming out it will help with shade selection even more.
Tom
Thanks for sharing your technique! I definitely agree about trying to do this in one visit is quite stressful. Especially if you do a few firings to first crystallize, fire to stain and then fire to glaze. And yes, it will definitely be nice to have the bigger shade selection for MTs...
Daniel,
It just seems to me you have more control doing it that way. Also seems like glaze just looks better if you do it separately. Just my opinion, only do this for anteriors.
Tom

Great Case Tom! Wonderful documentation... Looking forward to hanging out in Vegas.
Thanks for sharing,
JG

Nice pics!
I do the same things obviously. There will be some new videos on this posted We'd, September 16th
On 9/3/2015 at 5:48 am, Mike Skramstad (Faculty) said... Nice pics! I do the same things obviously. There will be some new videos on this posted We'd, September 16th
Mike, its ok, i'll let you take the credit. Just this once. But i take credit for the sharpie. Unless someone has claimed that before! ![]() Looking forward to the videos.
Looking forward to the videos.
Cool technique. I try to set my contacts 5mm above the bone to incourage good papilla fill. Ulitmately it may require a little perio surgery or perio-lase.

Tom, that is just a beautiful case. There were inherent difficulties but you really handled them well.
Jeff
On 9/3/2015 at 6:46 am, Tom Monahan said...On 9/3/2015 at 5:48 am, Mike Skramstad (Faculty) said... Nice pics! I do the same things obviously. There will be some new videos on this posted We'd, September 16thMike, its ok, i'll let you take the credit. Just this once. But i take credit for the sharpie. Unless someone has claimed that before!
Looking forward to the videos.
It's all you... Really nice stuff.
I don't use a sharpie per say in the mouth... it's more of a thin ink pen :)
Thanks for documenting this. It really shows the steps well.