Revolutionizing Practices Using Digital Dentistry: Part 3

By Dr. Ahmad Al-Hassiny
Sponsored by Ivoclar
Digital dentistry offers us incredible tools for same-day treatment of patients in immediate need and to control every aspect of a case whether it’s a single crown or smile makeover. Not only is a digital workflow more efficient than conventional treatment methods for restoring a patient's function and esthetics, it is also much more accurate. Digitally captured case data can be stored, cloned, shared with other team members very easily and manipulated in ways that conventional methods cannot provide. One of the most significant advantages of digitizing a case is the ability inspect and rotate the captured data, enlarge it and look at all aspects up close, which has a research-proven positive impact on the quality of the preparations and ultimately the fit and function of the final restorations.
Presented here are two cases, quite different in nature, which demonstrate the strength, versatility, and case control that digital dentistry brings to our practice.
Case 1
This case showcases how a trauma patient can be treated immediately in a single visit. This 19-year-old male presented to my practice with severely fractured teeth #7 and #8 (Figure 1) as a result of being assaulted. Unfortunately, he had waited 48 hours before seeking treatment and the exposed pulp required us to perform root canals on both anterior teeth with core build-ups to retain the crowns (Figure 2). The teeth were prepped and the preps scanned. Two full-contour crowns in shade A2 (IPS e.max CAD, Ivoclar Vivadent) were milled, then crystalized, stained, glazed and placed in the mouth (Figure 3). One year later the patient returned for a post-op appointment to ensure the success of the root canal procedure and that the margins had filled in nicely with no inflammation (Figures 4 and 5).
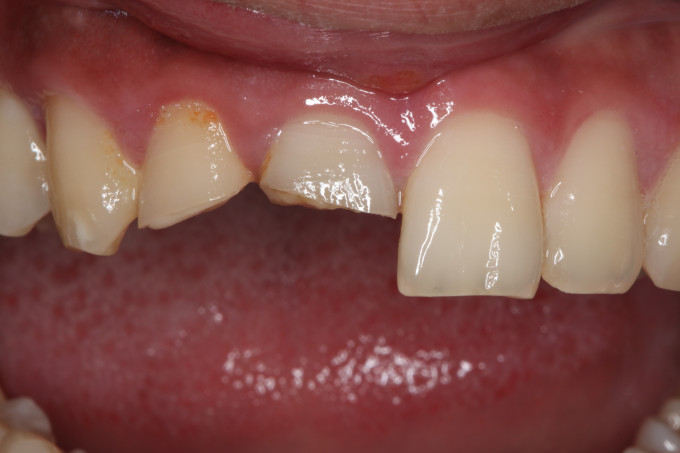
Figure 1: Blunt force trauma fractured and chipped this 19-year-old patient’s anterior teeth #7 and #8, which were repaired in single visit.
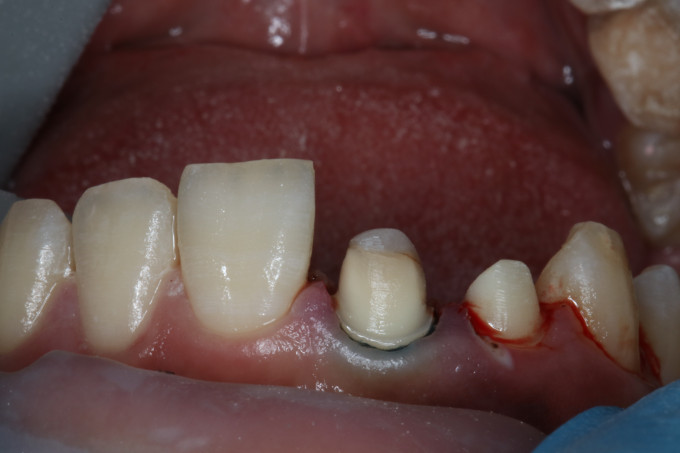
Figure 2: Patient delay in seeking treatment resulted in root canals on both teeth being needed due to irreversible pulpitis.

Figure 3: The two full contour IPS e.max CAD crowns immediately after seating.

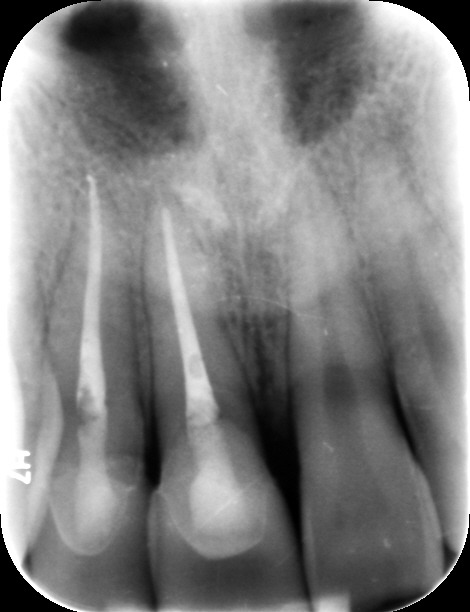
Figures 4 and 5: The patient one-year later confirmed marginal integrity of the two crowns and success of the root canal therapy.
Case 2 (Val)
This was one of those situations where the case was not completed in a single visit. However it demonstrates how digital dentistry allows the clinician to efficiently control every aspect of the case from preparation, temporization to final restorations. A 43-year-old woman came to my practice for a smile makeover to repair her chipped teeth and close the diastema between teeth #8 and #9 (Figure 6). Upon examination it was clear that the root canals on teeth #12 and #13 were failing and the pre-molar on her left side was compromised. It was decided to place a 4-unit full-contour zirconia bridge on teeth #11-14 and individual crowns in the esthetic zone on teeth #6, 7, 8, 9, and 10 (IPS e.max CAD, Ivoclar Vivadent). The teeth were prepped (Figure 7), scanned and new restorations created. We then 3D printed a model and filled the putty wash matrix (Figure 8) with a self-cure composite material (Luxatemp Ultra, DMG) to create provisionals for the patient to wear for a week to get feedback on fit, function and color (Figure 9). At the final appointment her comment that the provisionals were too white and didn’t match the rest of her teeth was noted for milling of the final restorations (Figures 10-11). The final restorations were milled and seated in the mouth at that second visit (Figure 12).

Figure 6: This 43-year-old patient presented with multiple chipped unaesthetic teeth, a large diastema, and failing root canals.
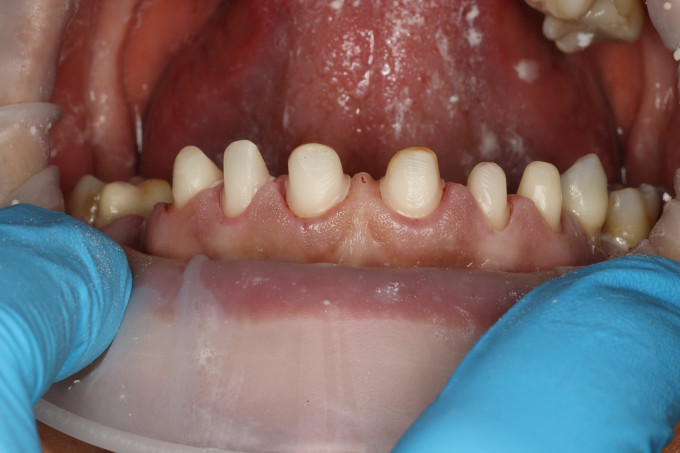
Figure 7: The patient’s teeth were prepped for a 4-unit zirconia bridge on teeth #11-#14 and single full-contour crowns on teeth #6-#10. The preps were scanned and the bridge and individual crowns created.
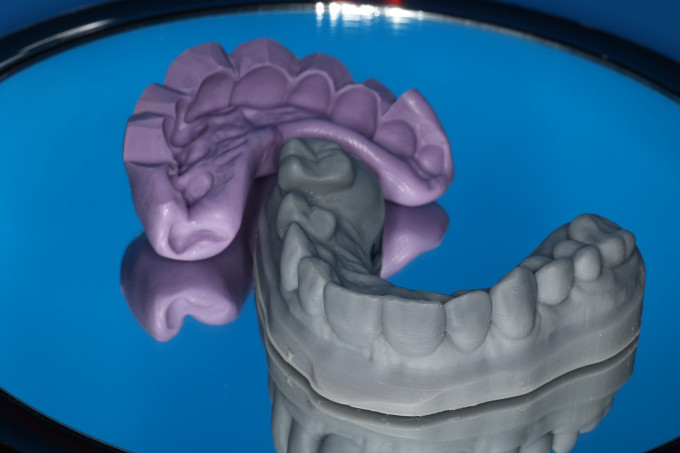
Figure 8: From a scan of the final design, a model was 3D printed and a putty wash matrix used to create provisionals.
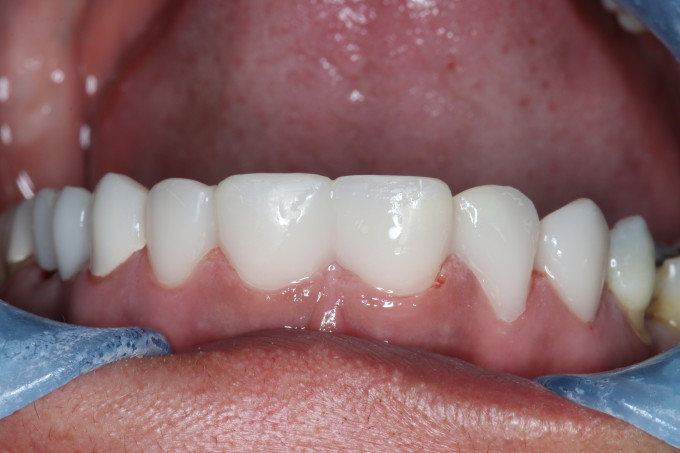
Figure 9: The patient was asked to wear the provisionals for a week to assure fit, function and esthetics of the treatment proposal.

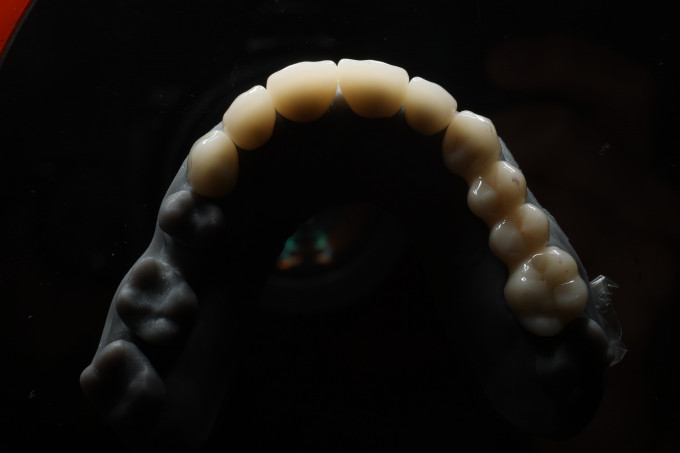
Figures 10 and 11: The final milled restorations on the model and seated in the mouth.

Figure 12: The final restorations immediately after seating.

This is very nice. For Case 1 what level translucency blocks did you use?
For the last case, how did you generate the digital wax up? Is there software that allows this to be done efficiently?
Thanks!
