Contacts - Easier with OMNICAM

Using the cerecdoctors.com suggested parameters for 4.0 for quite a while now has the majority of my restorations being adjustment free. If I am ever going to need an adjustment it will be ever so slightly in the contact areas. Taking advantage of a feature in 4.0, I have them dialed in now better than ever.
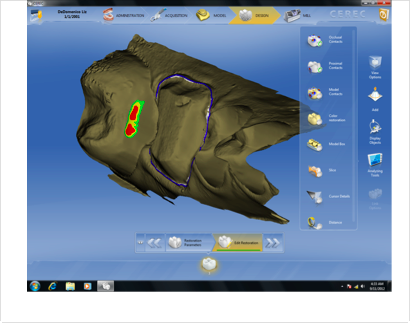
Of course great imaging of the adjacent tooth contacts is necessary in every case. Make sure with the Blue Cam you have no areas that you can see through in the acquisition phase preview. With the OMNICAM capturing these areas has never been easier. After proposing my restoration and adjusting it to my liking, I would normally turn the model off and reduce or add to the contacts to get them just so.
Quite often this will overbuild the contact into the gingival embrasure, which is in essence an undercut. This will affect my path of draw and not allow the crown to seat. Not a big deal really but frustrating never less.
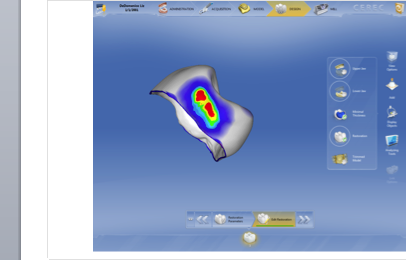
Now, instead of turning off the model, I leave it on and hit Model Box which is available through Analyzing Tools in the Side Bar. This gives me a view of the contact colors as seen here.
I then just form minus them down until they are gone.
This gives me a drop in restoration that draws well every time.
Nothing is fool proof but this is close. Watch out for contacts that are proposed open or small as the colors will not show at all. It’s best to broaden and widen the contact and then do this so you will not get stuck with a small or open contact. Enjoy it.