 Kristine Aadland
 Here is a woman that came in with an old PFM that had recurrent decay but she was nervous to replace it because she didn't want the new one to "stick out". These are the cases I love!!
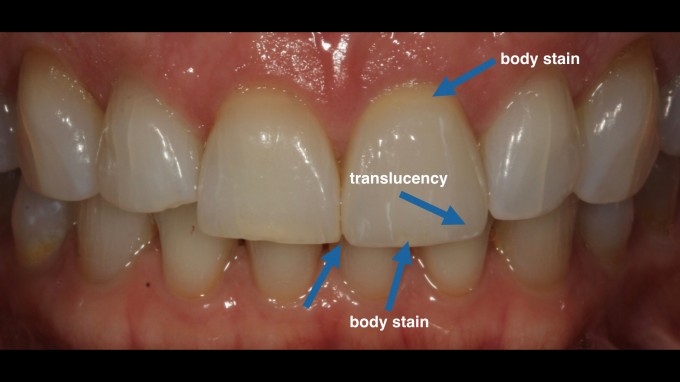
One tip that I like to do is mix my stains to get the color I want to achieve. This is a great example of that. She is pretty bright overall with a lot of translucency. Normally when I use brighter shades like B1 I would use "I 1" (the blue stain) to mimic the translucency, but in her case blue was just too bright- so I mixed it with the "I 2" (the grey stain) to tone it down but still give it some richness in color. I did the same thing for the body stain as well. The "1" stain (A range) was just a little too strong, so I mixed it with "creme" to tone it down. This only takes a few extra seconds but it gives you a huge palate of colors if you are willing to mix them.
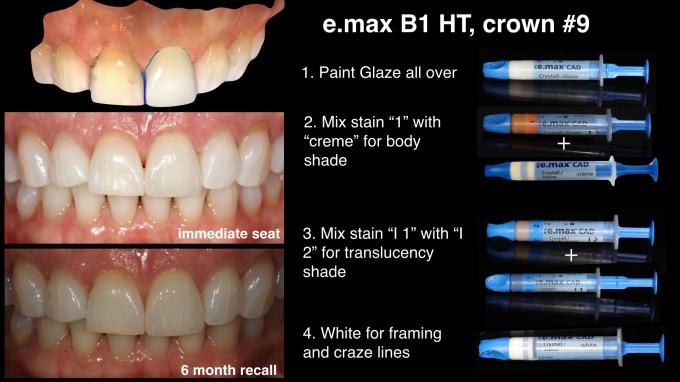
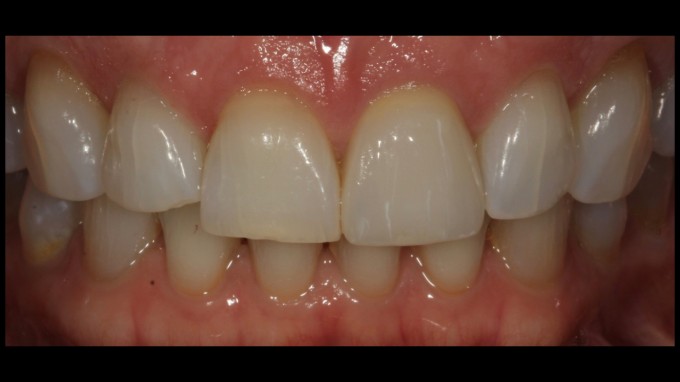
The second tip that I have learned from others on this site is to look at the case from different exposures. I just wanted to show that in this example with the two different pictures- immediate seat and follow up. Looking at the different exposures can really help see the color in the tooth in more distinction. To do this with my twin flash, I take one picture with my flashes all the way tilted back and take a second photo with my flashes all the way tilted forward. Some of this will depend on the light in the room as well, but this is just a fast way for me to look at the teeth in different light. You can also do this on a lot of apps- like the photo app on your iphone.
What do I do when I am done with these cases? I look at my photos and see what I would have done to change it. I do this with my assistant, never in front of a patient. This is how we all learn to be better and hopefully improve with each case. Posting cases are also a great way for all of us to improve. That is the value of cerecdoctors!
Here is what I would have done differently:
I would have added either a little bit of glaze to the mesial incisal corner to sharpen it, or contoured #8 to match. This is an area that drives me nuts. If you use the smooth tool at all in the area it will round the mesial incisal edge and this is what you will get. I try to over close this area prior to mill just for this reason, but I got a little carried away here in my contouring.
I would have used "creme" for the craze lines instead of white. In the mouth this doesn't show up as dramatic but my camera never lies. Using creme would have been more subtle and matched her other teeth better.
One tip that I picked up from some cases here on the boards- add the body stain at the incisal edge of worn looking teeth. Often if you look at anterior teeth there is a lot of color right at the incisal edge- dentin showing through with the wear. I love to add a little of the same color I used at the gingival 1/3 here to mimick the other teeth.
What was cool about this case- The patient was in my chair for 2 hours and left with a new crown that she loved. That is the power of CEREC that we have available to us every day.