 Rich Rosenblatt, D.M.D.
 I know that there is a lot of excitement about the new CEREC Chairside 4.3 software update, especially for Omnicam users since the imaging is so much improved. It will be rolling out over the next few months so that the Patterson Technology Center is not inundated with calls trying to help those that may struggle with the download. There is a way a workaround if you really want to get the advantage of the improved imaging for the Omnicam, so let me show you the secret!
The first thing you will need to do is to go to cerec-connect.com and update your CEREC Connect to the 4.3 software. Once you navigate to cerec-connect.com, click on the support tab and then click on software in the dropdown menu.

As you scroll down that page a bit, you will see the download for the CEREC Connect SW 4.3. If you are on your CEREC machine, you can click run and have it download directly to your machine. If your wifi is slow like mine, then you can download it to a thumb drive and then bring that to the machine and download the software from the thumb drive.
Once you download the software and update CEREC Connect to the 4.3 software version, you will then need to open each case in CEREC Connect. You will image as you normally do, you’ll stitch the bite, and mark the margins. Once you complete this, you will move the cursor to the top of the screen and in the drop down you will see an icon that says CEREC. I have taken a screen shot and placed a red arrow by it so you can’t miss it.

Click on that icon and it will then open up the CEREC Chairside Software. The software will open to the Administration screen.
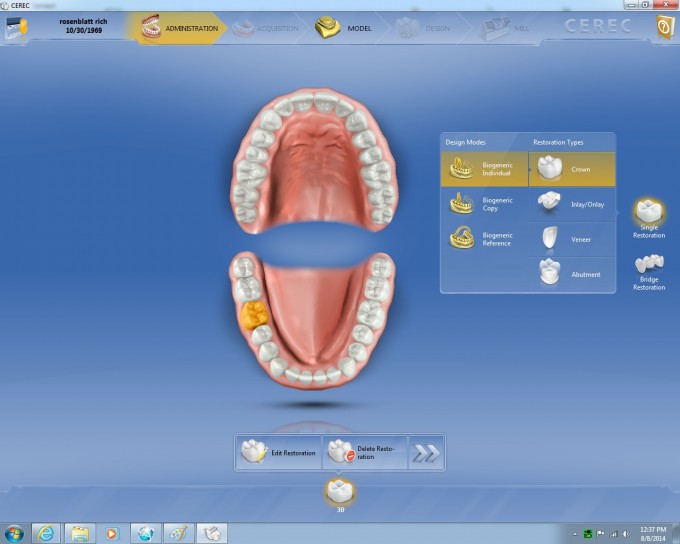
If you look at the Phase Bar at the top of the screen, we no longer have our images, but the model is active. Click on the Phase Bar where it says MODEL. You will get a warning that “resetting model axis causes deletion of already calculated restorations”.
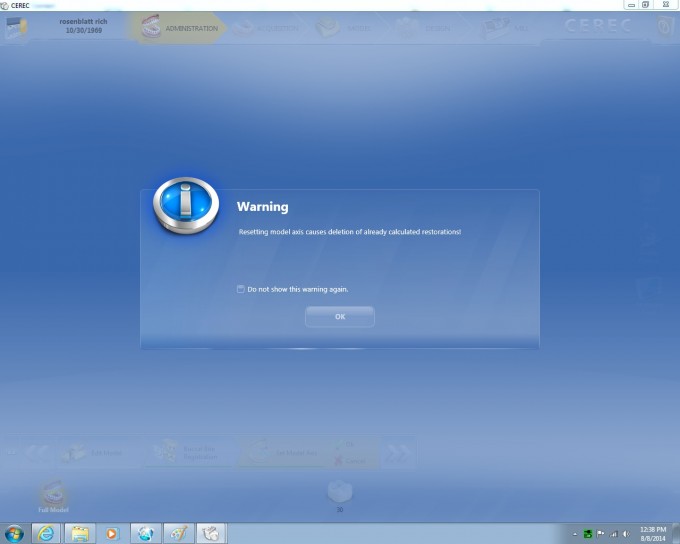
Click OK on this since you have not calculated a restoration. You will then be taken to the MODEL AXIS STEP.
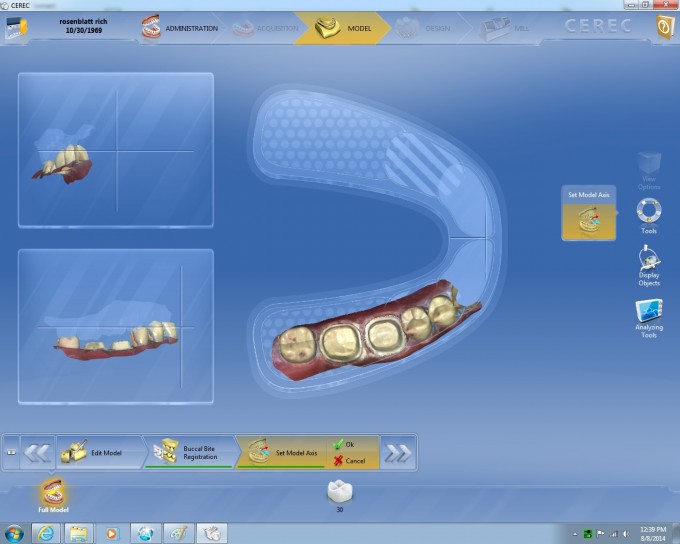
You will notice that the margin is marked in white. All you need to do at this point is set the MODEL AXIS and hit OK. Once you arrow forward from this, you will bypass the MARGIN step and be on the INSERTION AXIS step.

Just set the INSERTION AXIS and you are ready to design. This will not give you the ability to take advantage of the new tools that Chairside v4.3 has such as INCISAL VARIATION and others, and it really won’t be of any advantage to Bluecam users since it won’t improve their imaging. For those with the Omnicam, you will really like the improved imaging and it is worth giving this a try.